
0
Owner's of the Garmin Fish Finder FISHFINDER gave it a score of 0 out of 5. Here's how the scores stacked up:
2 Fishnder 300C Installation Instructions
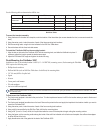
Use the following table to determine the drill bit size:
Material Material Thickness (in.) Material Thickness (mm) Hole Size (in.) Hole Size (mm) Hole Size (Drill Number)
Aluminum alloy
sheet metal
from1/32to5/64 from0.76to2.03
.128 3.25 30
from3/32to3/8 from2.28to9.52
.147 3.73 26
Fiberglass-allthicknesses
.140 3.56 28
HighDensityPlastic-allthicknesses
.125 3.17 1/8
Plywood(resinimpregnated)—Professionalinstallationrecommended
.144 3.66 27
Drill Size Table
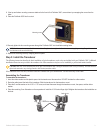
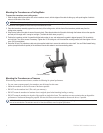
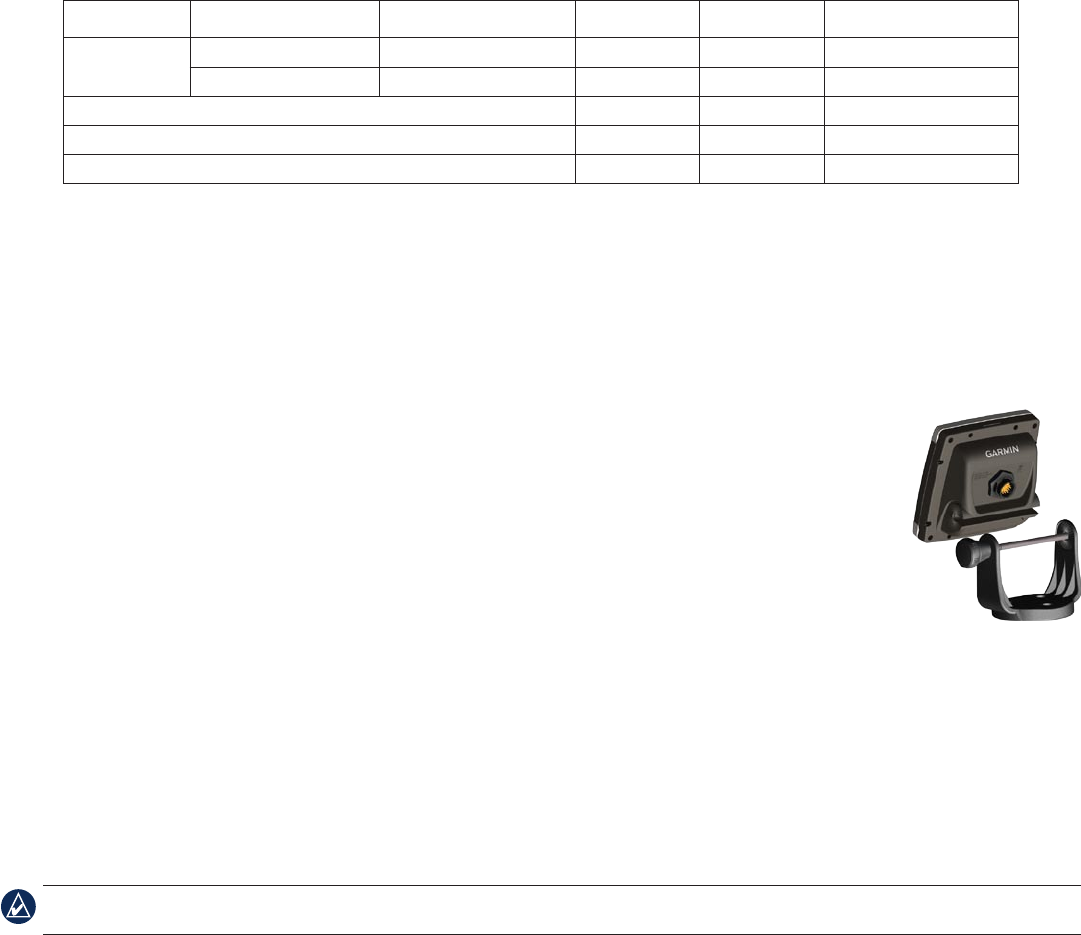
To mount the bracket assembly:
1. Usingthebaseofthebracketasatemplate,markthelocationofthethreeholes(twoscrewstowardsthefront,onescrewtowardsthe
back).
2. Usingthecenterpunch,indentthecenterofeachofthethreemounting-holelocations.
3. Drillthemountingholes,usingthebitsizeindicatedintheDrillSizeTableabove.
4. Securethebasewiththethreeincludedscrews.
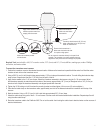
To install the Fishnder 300C on the mounting bracket:
1. AligntheslotonthebackoftheFishnder300Cwiththemountingknob,andslidetheshnderintoplace.If
necessary,adjusttheknobtospreadthebracketarmsapart.
2. AdjusttheFishnder300Cangleandtightentheknobuntilsnug.
Flush Mounting the Fishnder 300C
In addition to four of the included number 8 ANSI (4.2 × 1.4 DIN7981) mounting screws, ush mounting the Fishnder
300C requires the following tools:
Phillips-head screwdriver
Drill and drill bit (refer to Drill Size Table above for drill size) for mounting holes
3/8" (10 mm) drill bit for pilot hole
Jigsaw
Scissors
Center punch and hammer
File and sandpaper
Anti-seize lubricant (optional)
NOTE: Ensure that the surface on which you mount the Fishnder 300C has sufcient open space behind it to accommodate the Fishnder 300C and
the connected wires.
To ush mount the Fishnder 300C:
1. Theush-mounttemplateisincludedintheproductbox.Trimthetemplateandensureitwilltinthelocationwhereyouwanttoushmount
theFishnder300C.
2. Theush-mounttemplatehasadhesiveontheback.Removetheprotectivelinerandapplythetemplatetothelocationatwhichyouwantto
mounttheFishnder300C.
3. Usingthecenterpunch,indentthecenterofeachofthefourmounting-holelocations.
4. UsingadrillbitasspeciedbytheDrillSizeTable,drillthefourmountingholes.
5. Usinga3/8"(9mmor10mm)drillbit,drillapilotholeinsidethecornerofthetemplatetobegincuttingthemountingsurface.
6. Usingthejigsaw,cutthemountingsurfacealongtheinsideofthesolidlineindicatedontheush-mounttemplate.Usealeandsandpaper
torenethesizeofthehole.
7. ApplytheadhesivesideofthegaskettothebackoftheFishnder300C.
•
•
•
•
•
•
•
•


Find Your Products By Category
Please Login
